I recently made a new oscillating bird design for a magazine, so I thought I’d share it here too. After finding this toy idea on the brilliant Science Toy Maker site a couple of years ago, I made this woodpecker.
It’s based off of an old folk toy, and is a great way to teach kids about the science of potential energy.
It’s easy to make, and very fun to play with. I’ll insert the original instructions below, as well as a video so you can see it in action!
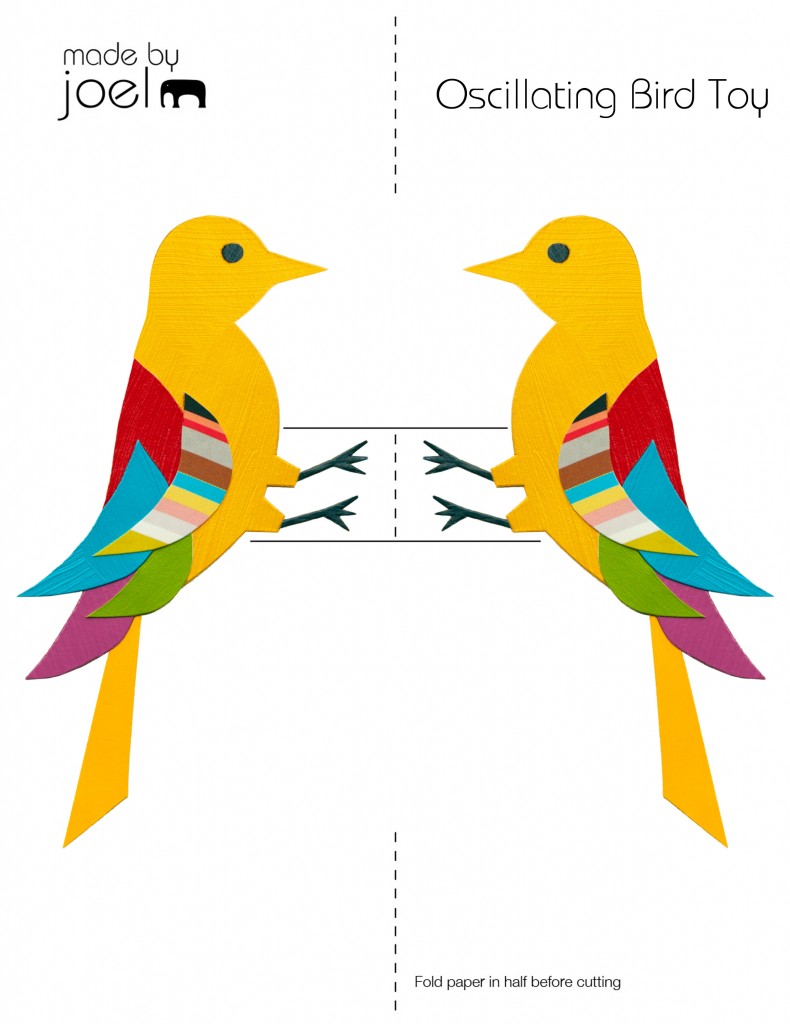
- Click on the template, print and cut it out. (I used a sturdy matte photo paper.) If you’d like, you can use the dotted lines and fold the paper in half lengthwise so you can cut both sides of the bird out at once. (When folding the paper you might want to fold against a bright window so you can get both sides to align perfectly.)
- Take a plastic straw and cut off one inch, then tape it in between the bird halves (see photo).
- Apply glue or tape to the rest of the bird and fold in half, sticking both sides together.
- Cut a thin rubber band (the thinner the better) and thread it through the straw. Now start pecking!
For more detailed instructions and to learn the physics of how this works, check out the Science Toy Maker post here. Also, my daughter kept letting go of the rubber band after the bird landed, so I tied some beads onto each end of the rubber band to keep it from falling out of the straw. Might be helpful if you have younger kids.